Managing VNet connectivity
As you are now aware, you can manage your VNet connectivity from the Azure portal. In the upcoming section, we are going to look at the possibilities that the Azure portal has to offer to manage the VNet connectivity.
Network topology
The network topology section in the Azure portal displays an overview of the VNets inside an Azure subscription and a resource group. To view the network topology section, you have to take the following steps:
- Navigate to the Azure portal by opening https://portal.azure.com/.
- Click the hamburger menu in the top-left corner of the Azure home screen. Select All services.
- Type network watcher in the search bar, and click Network Watcher.
- Under the Monitoring context, select Topology.
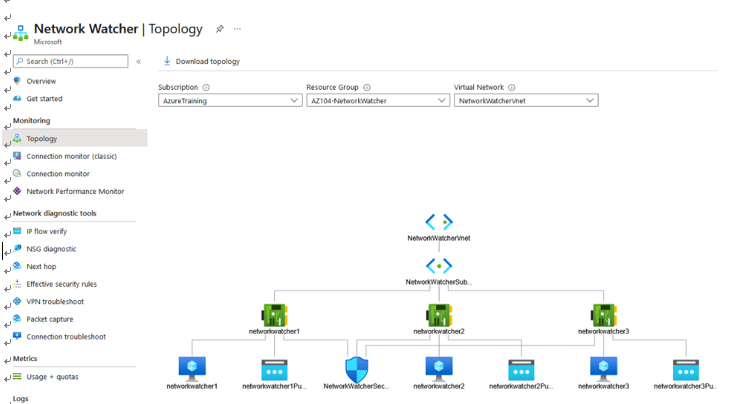
- Select the required details in Subscription, Resource Group, and, if relevant, Virtual Network, as shown in the following screenshot:

Figure 18.19 – Network Topology
Top Tip
Note that if you are not able to find your resource group in Topology under Network Watcher, you can also develop this by navigating to your VNet and selecting Diagram under the Monitoring context.
- You can now drill down into all the components of the network, such as the VNet, Network interface card (NIC), VMs, and IP address, by clicking on the items in the topology. This will take you to the settings of the different resources.
- You can download the topology as well, by clicking the Download topology button in the top menu:

Figure 18.20 – Downloading Network topology
Besides monitoring the networks in Azure, you can also monitor the on-premises connectivity. We are going to look at this in the next section.